I want to mount a Storage Account container in my notebook to write some files to it. Preferably without storage account keys.
 |
| Mount Storage Account in notebook |
Solution
You can use the Synapse Spark Utils to mount a storage account container within a notebook. It requires having a Linked Service that points to your Storage Account which is not using a Self Hosted Integration Runtime.
For this we use the default Linked Services which ends with [workspacename]-WorkspaceDefaultStorage. By default this Linked Service is using the System-assinged managed identity to authenicate to the Storage Account connected to Synapse.
Since we might be using this in a DTAP environment we don't want to hardcode the Linked Service name. Instead we will retrieve the Synapse workspace name with code and concat "-WorkspaceDefaultStorage" to it.
 |
| Default Workspace Linked Service |
Now when you want to debug your code in Synapse Studio it's best to also make sure your sparkpool is also running as managed idenity otherwise it will use your personal account. Also make sure that role Storage Blob Data Contributor is assigned.
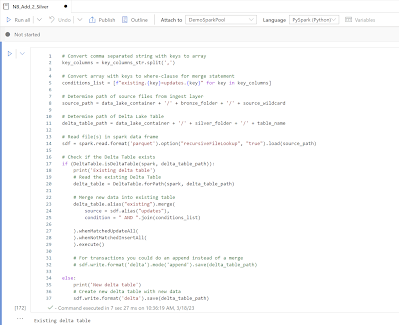
Now the python code. There is a lot displaying in the code to show what is happening, but there are no checks and no error handling in the code. You might want to add that when going to production to make your code more robust and get easier error messages.
# Import necessary modules
from notebookutils import mssparkutils  # Utilities for Synapse notebooks
import re  # Module for regular expressions
import os  # Module for interacting with the operating system

# Parameters
container_name = "mycontainer"  # Name of the storage container
display("Container: " + container_name)

# Retrieve Synapse Workspace Name to get the Linked Service
workspace_name = mssparkutils.env.getWorkspaceName()
display("Synapse Workspace: " + workspace_name)

# Determine the default Linked Service name using the Workspace Name
linked_service_name = f"{workspace_name}-WorkspaceDefaultStorage"
display("Default Linked Service: " + linked_service_name)

# Retrieve the full connection string from the Linked Service to retrieve storage account
connection_string = mssparkutils.credentials.getFullConnectionString(linked_service_name)
display("Connection String: " + connection_string)

# Extract storage account name from the connection string using regex
# Expected format: url=https://{storage_account_name}.dfs.core.windows.net
storage_account_pattern = r'//([^\.]+)\.'
storage_account_name = re.search(storage_account_pattern, connection_string).group(1)
display("Storage Account: " + storage_account_name)

# Mount the Storage Account container via the Linked Service
m = mssparkutils.fs.mount(
    f"abfss://{container_name}@{storage_account_name}.dfs.core.windows.net",
    "/mymount",
    {"linkedService": linked_service_name}
)

# Get the local path of the mounted container folder
# Example path format: '/synfs/notebook/{job_id}/{mount_name}'
root_folder = mssparkutils.fs.getMountPath("/mymount")
display("Root Folder: " + root_folder)

# Create a file path for a new dummy file within the mounted folder
# Note that the subfolder should exists or add code to create it.
file_name = os.path.join(root_folder, "myfolder/dummy_file.txt")
display("Creating File: " + file_name)

# Content to be written to the new dummy file
file_content = "This is an example file created and saved using Python."

# Open the file in write mode and write the content to it
with open(file_name, 'w') as file:
    file.write(file_content)
display("File created")

# Clean up mount
um = mssparkutils.fs.unmount("/mymount")
Now you will see the file appear in your storage account.
In this post we showed you how to use the managed idenity from a Linked Service to create a mount to the storage account container within a notebook. With this you can easily create or edit files in your Storage account when the pipeline doesn't provide the options you need.
Note: this code uses 'regular' Python and not PySpark which in some cases is unavoidable. However this also means that in Synapse this code is only running on the headnode. So all child nodes of your cluster are being totally useless and costing you money. For short processes that doesn't hurt that much, but for longer running jobs you should also consider alternatives like Azure Function Apps


