Case
I want to create an Azure Function with C# code. How do I create and deploy one in Azure (and use it Azure Data Factory)?
 |
| Write C# in Visual Studio Code to create an Azure Function |
Solution
In this blogpost we will create and deploy a very simple 'hello world' Azure Function with an HTTP trigger which you can extend to your own needs. After that we can use the Azure Data Factory pipeline with an Azure Function activity to execute it.
As an alternative you could also create an Azure Function with a Blob Storage trigger that executes when a new file arrives, but we rather want to use that same trigger type to start an Azure Data Factory pipeline that then starts this Function followed by other pipeline activities. This way we have one place that does the triggering/orchestration.
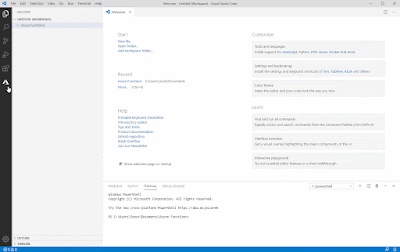
1) Create new Azure Function project
Please first follow the steps of our previous post on how to
prepare Visual Studio Code for creating Azure Functions with C#. After that open Visual Studio code and perform the steps below to create your first hello world Function.
- In Visual Studio code click on the Azure icon in the left menu.
- In the newly opened pane click on the folder with the lightning icon on it to create a new project. (An additional function can later-on be added to the project with the Lightning-plus icon)
- Select the folder of the new project (or use the Browse... option)
- Next select C# as coding language
- Select HTTP trigger as the template for this example
- Enter the Function name. This is the name of the function within the project (that can contain multiple functions). Example: myCSharpFunction
- Provide a namespace: Bitools.Function
- For this test example use anonymous as Authorization level
- The project has been created, but their could be an additional action in step 2
 |
| Create new Azure Function project |
2) Unresolved dependencies
This extra step seems to be a bug in the Azure Function extension for C# in Visual Studio code. After the project has been generated Visual Studio Code will show the following error in the lower right corner. This seems to refer to some missing references.
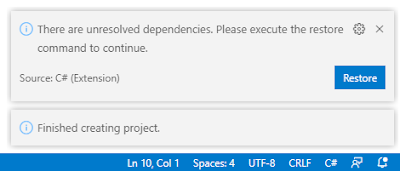 |
There are unresolved dependencies.
Please execute the restore command to continue. |
If you don't get this error then Microsoft probably solved the bug. When you do get it, the only thing you have to do is clicking the Restore button. After that some extra files will be added in the obj folder of your project. (see
previous post to compare extension versions)
 |
| Execute the restore command |
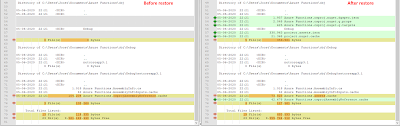 |
| Spot the differences |
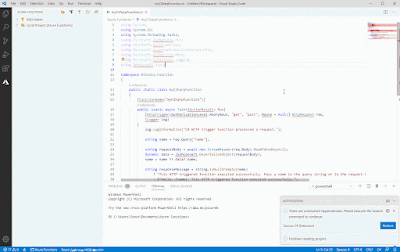
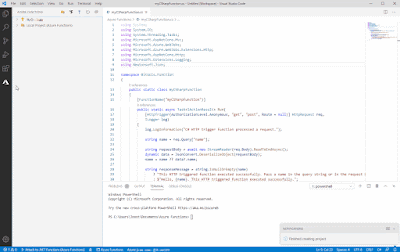
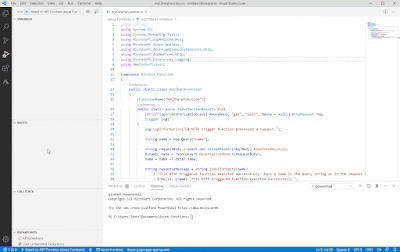
3) Code in myCSharpFunction.cs
The file 'myCSharpFunction.cs' contains your C# code. The name could be different when you gave your function a different name. Below you see the standard / generated code with some extra comment lines for if you are new to C#. For this example we do not extend the code.
// This section lists the namespaces that this function will be using frequently,
// and saves the programmer from specifying a fully qualified name every time that
// a method that is contained within is used
using System;
using System.IO;
using System.Threading.Tasks;
using Microsoft.AspNetCore.Mvc;
using Microsoft.Azure.WebJobs;
using Microsoft.Azure.WebJobs.Extensions.Http;
using Microsoft.AspNetCore.Http;
using Microsoft.Extensions.Logging;
using Newtonsoft.Json;

namespace Bitools.Function
{
    public static class myCSharpFunction
    {
        // Main function and entry point of this Azure Function
        [FunctionName("myCSharpFunction")]
        public static async Task<IActionResult> Run(
            [HttpTrigger(AuthorizationLevel.Anonymous, "get", "post", Route = null)] HttpRequest req,
            ILogger log)
        {
            // Log information
            log.LogInformation("C# HTTP trigger function processed a request.");

            // Retrieve parameter 'name' from querystring
            string name = req.Query["name"];

            // Also try to retrieve the same parameter from the request body
            string requestBody = await new StreamReader(req.Body).ReadToEndAsync();
            dynamic data = JsonConvert.DeserializeObject(requestBody);
            // If not found in querystring then use requestbody
            name = name ?? data?.name;

            // If name is still empty throw an error that a name parameter
            // is expected else response with a greeting
            string responseMessage = string.IsNullOrEmpty(name)
                ? "This HTTP triggered function executed successfully. Pass a name in the query string or in the request body for a personalized response."
                : $"Hello, {name}. This HTTP triggered function executed successfully.";

            return new OkObjectResult(responseMessage);
        }
    }
}
4) Debug locally
Now we are going to test the Azure Function locally on our Windows device. There are multiple ways to start debugging. Pressing F5 is probably the easiest. See animated gif for more options.
- In the Run menu on the top of the screen you will find the Start Debugging option.
- The terminal pane on the bottom will show a lot of details. Wait a few seconds for it to finish and click (while also pressing CTRL) on the green URL.
- A new browser window will open and it shows the error output that it cannot find the name parameter.
- In the browser add a querystring after the URL: ?name=Joost (or your own name of course). Now it will respond with a greeting
- Close the browser and then hit the disconnect icon on top to stop debugging
 |
| Debugging your function locally |
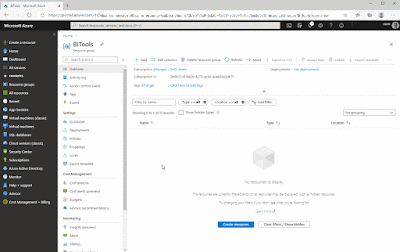
5) Create Azure Function in Azure Portal
Before you can deploy your newly created function you first need to create an Azure Function in the Azure portal.
- Go to the Azure Portal and click on Create a resource
- Search for function and select Function App
- Click on the Create button
- On the Basics tab you find the most important settings
- Select your Subscription and Resource Group
- Enter an unique Function App name
- Select .NET Core as Runtime stack
- Select 3.1 as Version
- Select the Region (probably the same as your Resource Group)
- Optionally go to the Hosting tab for extra settings
- Choose a new or existing Storage account
- Change the Plan type (default: Serverless)
- Optionally go to the Monitoring tab for extra settings
- Disable or enable Application insights and change its name
- Click the Review + create button
- Review the settings and click on the Create button
 |
| Create new Azure Function (app) on Azure portal |
Note 1: you cannot create an Azure Function with a Windows worker (.NET Core) if there is already a Linux worker (Python) in that same resource group and with the same region.
Note 2: you could also perform these steps within Visual Studio Code during deployment.
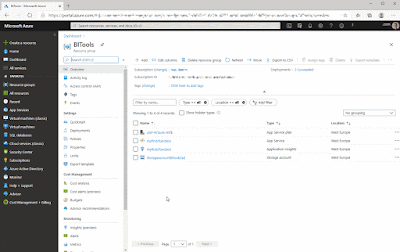
6) Deploy Azure Function to Azure Portal
Now that we have an (empty) Azure Functions app in the Azure portal we can deploy our newly created Azure Function to this resource.
- In Visual Studio code click on the Azure icon in the left menu.
- In the newly opened pane click on the blue arrow (deploy) icon
- In the drop down select your Azure Functions App from the previous step
 |
| Deploy Azure Functions from Visual Studio Code |
7) Testing in portal
Now that we have deployed our project to Azure Functions we can test it in the Azure Portal. For this example we will use the post method.
- Go to the Azure Portal and then open your Azure Functions App
- In the left menu click on Functions
- In the list of functions click on your function (only one in this example)
- In the left menu click on Code + Test
- Click on the test button (top center)
- Change the HTTP method to post
- Select one of the keys
- Enter a JSON message in the body: {"name":"Joost"} (name=case-sensitive)
- Click on the Run button and see the result
 |
| Testing in the Azure Portal |
8) Executing from Azure Data Factory
Now if you want to execute this new Azure Function in Azure Data Factory with the Azure Function Activity you can follow the steps in
this previous post. However without code changes it will return an error stating that the response is invalid: 3603 - Response Content is not a valid JObject
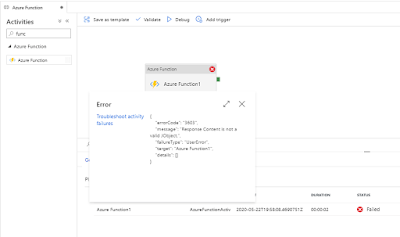 |
| 3603 - Response Content is not a valid JObject |
At the moment it is returning a so called JArray, but it is expecting a JObject (J = JSON). Any other return types than JObject will throw the error above. To overcome this we need a minor code change at the end by changing the return construction at line 37.
// This section lists the namespaces that this function will be using frequently,
// and saves the programmer from specifying a fully qualified name every time that
// a method that is contained within is used
using System;
using System.IO;
using System.Threading.Tasks;
using Microsoft.AspNetCore.Mvc;
using Microsoft.Azure.WebJobs;
using Microsoft.Azure.WebJobs.Extensions.Http;
using Microsoft.AspNetCore.Http;
using Microsoft.Extensions.Logging;
using Newtonsoft.Json;

namespace Bitools.Function
{
    public static class myCSharpFunction
    {
        // Main function and entry point of this Azure Function
        [FunctionName("myCSharpFunction")]
        public static async Task<IActionResult> Run(
            [HttpTrigger(AuthorizationLevel.Anonymous, "get", "post", Route = null)] HttpRequest req,
            ILogger log)
        {
            // Log information
            log.LogInformation("C# HTTP trigger function processed a request.");

            // Retrieve parameter 'name' from querystring
            string name = req.Query["name"];

            // Also try to retrieve the same parameter from the request body
            string requestBody = await new StreamReader(req.Body).ReadToEndAsync();
            dynamic data = JsonConvert.DeserializeObject(requestBody);
            name = name ?? data?.name;

            // If name is still empty throw an error that a name parameter
            // is expected else response with a greeting
            return name != null
                ? (ActionResult)new OkObjectResult(new {message = "Hello " + name})
                : new BadRequestObjectResult("Pass a name in the query string or in the request body for a personalized response.");

            /*
            string responseMessage = string.IsNullOrEmpty(name)
                ? "This HTTP triggered function executed successfully. Pass a name in the query string or in the request body for a personalized response."
                : $"Hello, {name}. This HTTP triggered function executed successfully.";

            return new OkObjectResult(responseMessage);
            */
        }
    }
}
Below a couple of screenshots on how to configure and test this in Azure Data Factory. You might want to store the Function key in
Azure Key Vault to avoid keys in your ETL/ELT code.
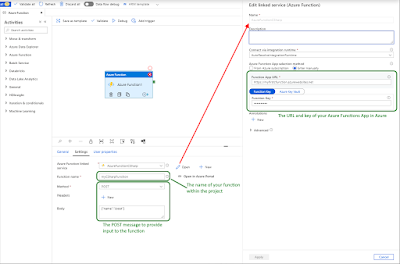 |
| Set up the Azure Function Activity in Azure Data Factory |
After configuring the Azure Function activity you can hit the debug button and see the result. This output could then be used as input for successive pipeline activities
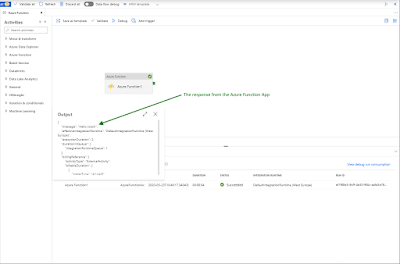 |
| Successfully executing and getting the response |
Conclusion
First a big
thank you to colleague
Walter ter Maten for always helping me out with the C# stuff. In this blog post you learned how to create, test and deploy your first (very basic) Azure Function App with C# code. Then we also showed you how to execute this from Azure Data Factory. In a couple of follow up posts we will show you how to build some useful functions for DWH projects and show you some technical stuff like adding Azure Key Vault to the game. Also check out the
Python version of this blogpost.


