I want to up- and downscale my Azure SQL Database within my ADF pipeline. You recently showed how do this with Powershell code in an Automation Runbook, but that is too much coding for me. You also showed how to do this with some simple TSQL code, but that requires a lot of database permissions for the ETL user. Is there a codeless solution in Azure Data Factory which doesn't require permissions within my Azure SQL Database?
 |
| Change the Tier of your SQL Azure DB |
Solution
Yes: Rest API! And don't worry there is no coding required. For this example we will use the Web activity to call the Rest API of SQL Server. This doesn't require any coding or permissions within the database itself. However you need ofcourse some permissions to change the database Pricing Tier. For this we will be using managed identities for Azure resources: we will give the Azure Data Factory permissions to the Azure SQL Server.
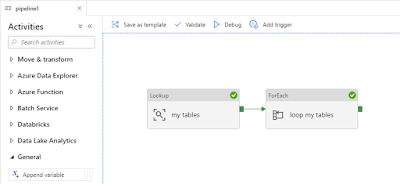
For this example we assume you already have an ADF with a pipeline for your ETL which we will extend with an upscale and a downscale.
 |
| Stage multiple tables in a foreach loop |
1) Assign permissions to ADF
The permissions will be granted to the Azure SQL Server and not to a specific database. To change the database Pricing Tier with ADF, we need a role that can only change the database settings, but nothing security related: Contributer, SQL DB Contributer or SQL Server Contributer.
- Go to the Azure SQL Server of the database that you want to up- or downscale with ADF
- In the left menu click on Access control (IAM)
- Click on Add, Add role assignment
- In the 'Role' drop down select 'SQL DB Contributer'
- In the 'Assign access to' drop down select Data Factory
- Search for your Data Factory, select it and click on Save
 |
| Not enough permissions |
{
    "errorCode": "2108",
    "message": "{\"error\":{\"code\":\"AuthorizationFailed\",\"message\":\"The client 'xxxxxx-xxxx-xxxx-xxxx-xxxxxxxxxxxx' with object id 'xxxxxx-xxxx-xxxx-xxxx-xxxxxxxxxxxx' does not have authorization to perform action 'Microsoft.Sql/servers/databases/write' over scope '/subscriptions/xxxxxx-xxxx-xxxx-xxxx-xxxxxxxxxxxx/resourceGroups/Joost_van_Rossum/providers/Microsoft.Sql/servers/bitools2/databases/Stage' or the scope is invalid. If access was recently granted, please refresh your credentials.\"}}",
    "failureType": "UserError",
    "target": "Upscale Stage DB",
    "details": []
}
2) Get URL Rest API
Now it is almost time to edit your ADF pipeline. The first step will be adding a Web activity to call the Rest API, but before we can do that we need to determine the URL of this API which you can find here. Check the api version because it changes regularly.
https://management.azure.com/subscriptions/{subscriptionId}/resourceGroups/{resourceGroupName}/providers/Microsoft.Sql/servers/{serverName}/databases/{databaseName}?api-version=2021-02-01-preview
Within this URL you need to replace all parts that start and end with a curly bracket: {subscriptionId}, {resourceGroupName}, {serverName} and {databaseName} (including the brackets themselves). Don't use a URL (bitools2.database.windows.net) for the database server name, but use only the name:
https://management.azure.com/subscriptions/xxxxxx-xxxx-xxxx-xxxx-xxxxxxxxxxxx/resourceGroups/Joost_van_Rossum/providers/Microsoft.Sql/servers/bitools2/databases/Stage?api-version=2021-02-01-preview
3) JSON message for Rest API
The Rest API expects a JSON message with the pricing tier for which you can find the details here under SKU. For some reason the location is required in these messages. Here are two example which you need to adjust for your requirements:
{"sku":{"name":"S1","tier":"Standard"}, "location": "West Europe"}
or
{"sku":{"name":"Basic","tier":"Basic"}, "location": "West Europe"}
3) Upscale DB
Go to your existing ADF pipeline to add an upscale (and downscale) activity
- Add a Web activity in front of the existing Lookup activity
- Give it a descriptive name: Upscale Stage DB
- Go to the Settings tab of the Web activity
- For URL enter the URL you created in step 2
- For Method choose PUT
- Add a new Header called 'Content-Type' with the value 'application/json'
- Copy the JSON message that you create in step 3 to the Body
- Collapse Advanced at the bottum
- Choose MSI (old name for Managed Instance) as authentication
- Enter 'https://management.azure.com/' in the Resource field. This is the URL for Managed Identity
 |
| Add Web activity to call Rest API |
4) Downscale DB
Repeat the previous step, but now add the downscale activity at the end
Repeat the previous step, but now add the downscale activity at the end
- Add a second Web activity, but now after your ETL activity (foreach in this example)
- Give it a descriptive name: Downscale Stage DB
- Go to the Settings tab of the Web activity
- For URL enter the URL you created in step 2
- For Method choose PUT
- Add a new Header called 'Content-Type' with the value 'application/json'
- Copy the JSON message that you create in step 3 to the Body
- Collapse Advanced at the bottum
- Choose MSI (old name for Managed Instance) as authentication
- Enter 'https://management.azure.com/' in the Resource field
 |
| Adding an upscale and downscale via Rest API |
In this post you learned how to give a resource (ADF) access to an other resource (SQL Server) via Managed Identities. Then we showed you how to call a Rest API in an ADF pipline Web activity for which we didn't have to write any code at all. From all the different options we showed you to Up- and Downscale an Azure SQL Database this is probably the easiest and safest method especially when you want to incorporate in your ETL process. An other positive thing is that the Rest API call is synchronous which means it doesn't start the ETL before the database has been upscaled. So no extra wait activities required.
No comments:
Post a Comment
All comments will be verified first to avoid URL spammers. यूआरएल स्पैमर से बचने के लिए सभी टिप्पणियों को पहले सत्यापित किया जाएगा।