Wednesday, 31 October 2018

Power BI Snack: Introducing Data Profiling

Case
When data is not extracted from a cleaned up or validated environment, such as a Data Warehouse or Data Mart, the first step is to analyse and possible clean up the data. How can Power BI help in this?

Data Profiling in Power Query Editor


Solution
The release of October 2018 Desktop update introduced a new (preview) feature that can profiling the data in the Power Query Editor. With this, you can do some quick analysis over your data and you can easily identify errors and empty values in a column.

For this blog post we use sample data from WideWorldImporters. We have saved the data in a CSV file, because it is more common to do this kind of analyses when you load raw data from Text or CSV files into your Power BI Model instead of using validated data from a star schema in a Data Mart.

Apply data profiling in Power BI
Because it is a preview feature, we have to turn this feature on. Go to "File - Options and settings - Options - Preview features" and select Enable column profiling.

Power BI Desktop - Enable Preview feature


Open the Power Query Editor and load your data. In our case it is a CSV file that contains raw data about sales orders. Go to the "View" tab and select Column quality. With this option you can see whether your data contains errors or empty values, also known as "null" values.

Power BI Desktop - Column quality in Power Query Editor


Besides this, you can also view the total of unique and distinct values. Go to the "View" tab and select Column distribution. Unique values indicates how many values occur only once and distinct values means how many different values there are in the specific column. Now the Query Editor will also recommend to do a quick fix if you want, for example remove the duplicate values in a column.

Power BI Desktop - Column distribution in Power Query Editor


Note:
Be aware of the fact that column profiling is only based on top 1000 rows (preview results of the query).

Conclusion
In this post you saw a new feature called "Data Profiling". It is a good start and useful to use this for doing some quick analyses over your data. Note that this feature is in preview.

The program team of Power BI has announced to add more capabilities for data profiling, so we are very curious about what this will bring even more in the future.

Saturday, 29 September 2018

SSRS Snack: Download all SSRS reports

Case
I want to download all my SSRS reports (and data sources) from my Reporting server, but not manually. Is there a solution?
My Reporting Server


Solution
The easiest way to do this is with some PowerShell scripting and the SSRS webservice. The following PowerShell script recreates the SSRS folder structure on a local drive and downloads all reports (*.rdl) and all data sources (*.rds) to the corresponding folders.

Note 1: you need full access if you want to download everything
Note 2: empty folders are not recreated locally
Note 3: It only works for SSRS 2012 and higher (webservice differs for older versions)


1) PowerShell ISE
Open PowerShell ISE and copy and paste the code below. Determine the local folder (line 7) and provide the URL of the Reporting server on line 8 (without "/reports"). For this example the SSRS server is located on a Virtual Machine in Azure.

###################################################################################
# Download Reports and DataSources from a SSRS server and create the same folder
# structure in the local download folder.
###################################################################################
# Parameters
###################################################################################
$downloadFolder = "c:\temp\ssrs\"
$ssrsServer = "http://myssrs.westeurope.cloudapp.azure.com"
###################################################################################
# If you can't use integrated security
#$secpasswd = ConvertTo-SecureString "MyPassword!" -AsPlainText -Force
#$mycreds = New-Object System.Management.Automation.PSCredential ("MyUser", $secpasswd)
#$ssrsProxy = New-WebServiceProxy -Uri "$($ssrsServer)/ReportServer/ReportService2010.asmx?WSDL" -Credential $mycreds

# SSRS Webserver call
$ssrsProxy = New-WebServiceProxy -Uri "$($ssrsServer)/ReportServer/ReportService2010.asmx?WSDL" -UseDefaultCredential

# List everything on the Report Server, recursively, but filter to keep Reports and DataSources
$ssrsItems = $ssrsProxy.ListChildren("/", $true) | Where-Object {$_.TypeName -eq "DataSource" -or $_.TypeName -eq "Report"}

# Loop through reports and data sources
Foreach($ssrsItem in $ssrsItems)
{
    # Determine extension for Reports and DataSources
    if ($ssrsItem.TypeName -eq "Report")
    {
        $extension = ".rdl"
    }
    else
    {
        $extension = ".rds"
    }
    
    # Write path to screen for debug purposes
    Write-Host "Downloading $($ssrsItem.Path)$($extension)";

    # Create download folder if it doesn't exist (concatenate: "c:\temp\ssrs\" and "/SSRSFolder/")
    $downloadFolderSub = $downloadFolder.Trim('\') + $ssrsItem.Path.Replace($ssrsItem.Name,"").Replace("/","\").Trim() 
    New-Item -ItemType Directory -Path $downloadFolderSub -Force > $null

    # Get SSRS file bytes in a variable
    $ssrsFile = New-Object System.Xml.XmlDocument
    [byte[]] $ssrsDefinition = $null
    $ssrsDefinition = $ssrsProxy.GetItemDefinition($ssrsItem.Path)

    # Download the actual bytes
    [System.IO.MemoryStream] $memoryStream = New-Object System.IO.MemoryStream(@(,$ssrsDefinition))
    $ssrsFile.Load($memoryStream)
    $fullDataSourceFileName = $downloadFolderSub + "\" + $ssrsItem.Name +  $extension;
    $ssrsFile.Save($fullDataSourceFileName);
}

There is also code (comment out) to provide a username and password in case you cannot use integrated security. Replace line 16 with the code on lines 11 to 13 and provide the username and password.

2) Result
Running the script in PowerShell ISE downloads all reports and data sources.
Downloading all reports

Summary
This is a 'quick & dirty' script to download all SSRS reports at once. You can adjust the script to you own needs and make it more beautiful. A upload(/deploy) script will be provided in a next blog post.


Friday, 31 August 2018

Power Apps Snack: Pass values to other screen

Case
I want to navigate to a new screen and get a value from the calling screen to filter a specific record on that new screen. Most examples (including 'Start from data') filter a record with the selected item from a specific gallery (on a specific screen) with:
BrowseGallery1.Selected
However I want to call this screen from various calling screens (not just one). Is there a push meganism instead of  a pull meganism to filter the record on the new screen?
Navigating to a new screen from various screens


Solution
The solution is to pass a value from the calling screen to the new screen. The Navigate function has an optional argument called 'UpdateContextRecord' which allows you to pass a record to the new screen which on its turn updates the context variable on the new screen. Then you can use that variable to filter a specific record.


1) Calling screen(s)
In PowerApps a record with one column (a variable) looks like:
{myIntColumn:123}

If you put this in the 'UpdateContextRecord' argument from the Navigate function it looks like:
Navigate(myNewScreen, 
         ScreenTransition.None, 
         {myIntValue:123})


The hardcoded '123' should of course be replaced with some code to get the value from a gallery column on the calling screen. The Value function converts the string to a number:
Navigate(myNewScreen,
         ScreenTransition.None,
         {myIntValue:Value(ThisItem.myIntColumn)})

You need to repeat this on all calling screens that want to navigate to this new screen.

2) New screen
On the new screen this record will be pushed to a new context variable which can be used in for example a LookUp function in the Item property of a form:
LookUp('[dbo].[myTable]', myIntColumn=myIntValue)
Changed from pull to push


Alternative form item formula:
First(Filter('[dbo].[myTable]',myIntColumn= myIntValue))
Conclusion
In this post you learned how to pass through variables from one screen to an other. This can be used to pass through values for filters from several screens instead of just reading values from one screen.

Wednesday, 29 August 2018

Power Apps: Introduce Power Apps for Power BI

Case
With PowerApps, Microsoft brought a new element to the existing world of reporting and dashboarding inside the Microsoft BI stack. For example, you can connect and customize your data using PowerApps. How does this work and how can you use PowerApps inside Power BI?

Power BI Marketplace - PowerApps custom visual


Solution
Important to know is that Microsoft PowerApps is part of Office 365. In case your organization does not have an Office 365 licence, PowerApps will cost 7 or 40 dollar per user per month. With a license, you can start building your own apps. There are more features available for an additional cost. More details about pricing here.

In this post we want to show you how you can connect to your data and store new data in an Azure SQL Database using PowerApps. For this example, you can give as Sales Employee approval (or not) on the report. This all happens in a Power BI dashboard using PowerApps.

1) Create new PowerApp
We will build the PowerApp using the Power BI Desktop and service. First, you have to create a new report in Power BI Desktop and add the PowerApps custom visual to the report. Choose PowerApps from the marketplace. Notice that this visual is still in Preview.

Power BI Desktop - Add PowerApps custom visual


For our example, we will use data from WideWorldImportersDW (Azure SQL Database) and import the "Employee" dimension and "Sales" fact table. We have implemented a number of transformations to keep only sales employees and created a 'Employee Full Name' column with values like 'Schuurman, Ricardo'. We choose the columns 'Employee Full Name' and 'Profit' in the PowerApps custom visual.

After you have published your report and opened it in the Power BI service, you will see the option Create new. You will be redirected to the development portal of PowerApps.

Power BI Service - Create new PowerApp using custom visual

Note:
When you create a new PowerApp using the Power BI service, a new dataset for the Power BI data will automatically be created with the name "'PowerBIIntegration'.Data".

2) Build PowerApp
Once you are in the development portal, you can start building your app. In a next post we will fine tune the app and explain and show you several elements of the PowerApp.

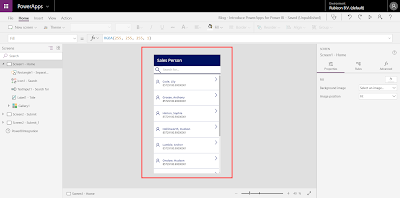
PowerApps Studio - Developing the PowerApp


Important to know is that we have created a new table in WideWorldImportersDW, called "SalesApproval".

USE [WideWorldImportersDW]

CREATE TABLE [PowerBI].[SalesApproval](
 [SalesApprovalKey] [int] IDENTITY(1,1) NOT NULL,
 [EmployeeFullName] [nvarchar](100) NULL,
 [Profit] [numeric](20, 8) NULL,
 [Approved] [nvarchar](50) NULL,
 [Comment] [nvarchar](max) NULL,
 CONSTRAINT [PK_Dimension_Employee] PRIMARY KEY CLUSTERED 
(
 [SalesApprovalKey] ASC
)WITH (STATISTICS_NORECOMPUTE = OFF, IGNORE_DUP_KEY = OFF) ON [PRIMARY]
) ON [PRIMARY] TEXTIMAGE_ON [PRIMARY]
GO

In this table we will store the data we have filled with the PowerApp. Later on we will show you how to do this and which data will be stored.

When you are done developing, you have to save and publish the PowerApp. After this, the app is live and available in several applications, such as Power BI and Microsoft Teams.

PowerApps Studio - Publishing the PowerApp


Note:
After saving and publishing your PowerApp it can happen that the PowerApp is missing the Power BI data the next time you open it. To fix this, go to the Power BI service and add a new Power Apps custom visual in the report. Select the right columns (in PowerApps Data) and click on Choose app. Add your existing app and go to the PowerApps Studio. Now your PowerApp is working again, including the Power BI data.

3) Result
Let's see if we can use this PowerApp in Power BI and store the result in the table "SalesApproval" we created earlier. Go to the Power BI service and open the report. Search for the right sales person (this is you as sales person if this dashboard is live) and fill in the form:
Yes or No for approval and associated comment (Text input). Press Submit when you are done.

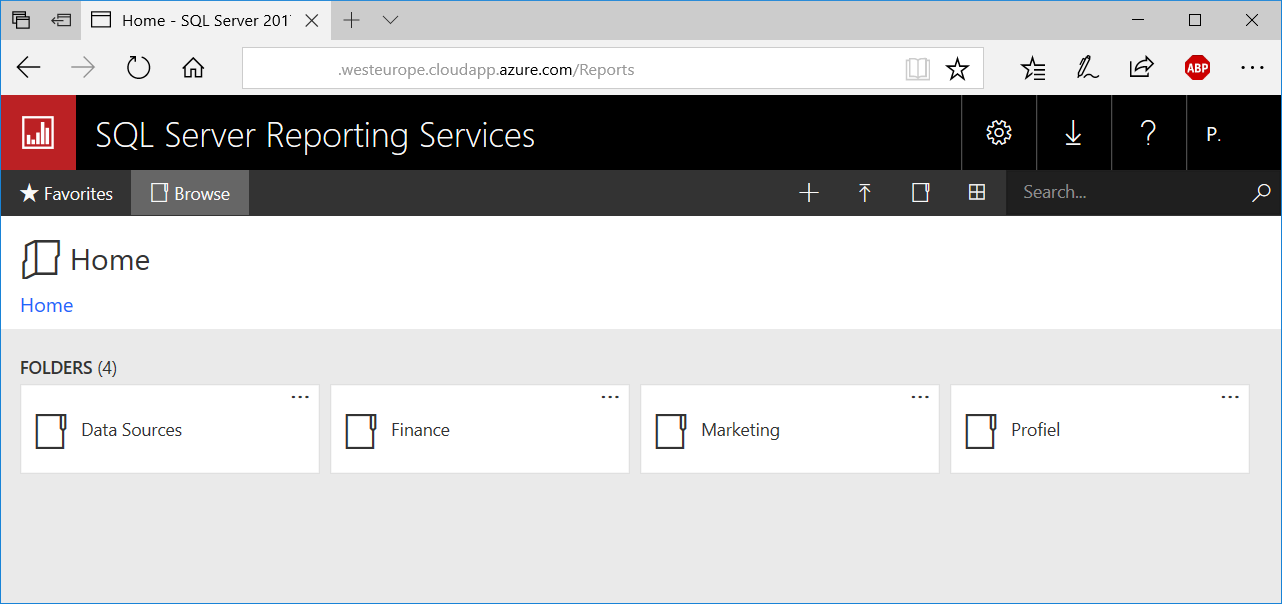
Now if we look at the table in SQL Server Management, we see a new record containing the data we have filled in. Cool!

Power BI Service - Submit data in PowerApp (custom visual) and result


You can download the Power BI report here and the first version of the corresponding PowerApp we used for this post here. Use the Export (preview) and Import (preview) feature to add the app in your environment.

Note:
The Export and Import feature is still in preview. After preview, you must have PowerApps Plan 2 trial or PowerApps Plan 2 paid license for this feature.

Summary
In this post you saw how to use the PowerApps custom visual in Power BI. For this example we used PowerApps to approve (or not) a sales report and store this data in an Azure SQL Database.

In a next post we will describe and explain how this PowerApp is build. We will also customize the app to make it more user friendly.

Sunday, 8 July 2018

Power Apps Snack: Replace Textbox by Drop down

Case
I generated an app with Microsoft PowerApps, but I want to replace the generated textbox on a foreign key field (integer) with a Drop Down with values from the related table. This would make the form much more usable. How do I accomplish this in PowerApps?
Replace standard textbox


Solution
For this example we have two tables: Job and JobStep. JobStep has a Foreign Key to Job. This is a one to many (1-n) relationship. By default this (foreign key/integer column) will become a textbox when you generate an app on data. We will be replacing it with a Drop Down that stores the JobId, but shows the Job name instead. Below you see the model.
1-n relation with Foreign Key on JobStep.JobId = Job.JobId


1) Add Data source
The app is generated on the JobStep table only. If we want to get a list of Jobs to show, we need to add an extra data source for the Job table. Via the View menu click on Data Sources and then on Add data source. Now you can select the server and then the table.
Add Data source


2) Replace Textbox by Drop Down
The default field type for this integer column (JobId) is a textbox. We will replace this by a Drop Down by taking the following actions.

  • Click on the datacard of JobId (not only the textbox) and then click on Edit in the property pane.
  • Click on the 123 option behind the JobId field and change it from Edit Number to Allowed Values.

Now the Textbox has been changed to a Drow Down box. Next step is to show the names from the Jobs table.
Change textbox to drop down


3) Show name in Drop Down
Now that we have a Drop Down we need to fill it with the Name column from the Job table.
  • Click on the Drop Down box itself
  • Go to the Advanced tab in the property pane on the right and click on 'Unlock to change properties' to override the default settings.
  • Go to the ITEMS property and replace it by the Job table: '[dbo].[Job]'
  • In the VALUE property select the field you want to show: Name in this case.
  • Then enter this expression in the DEFAULT property to retrieve the Name column via the JobId column.: LookUp('[dbo].[Job]', JobId = ThisItem.JobId, Name)
Change Drop Box properties to show the Name column


Explanation Lookup expression:
  • FROM: First part is the table where you want to do the lookup. Where does your data come from? In our case this is the Job table.
  • WHERE: Second part is the WHERE statement, where JobId is the column in lookup table (Job). The part after the equals sign is the lookup value that comes from your app.
  • SELECT: The last part is the column that you want to retrieve. In our example we want to show the Name column from the Job table.

4) Saving the ID

The Drop Down is now showing the Name column, but we want to save the id column JobId.
  • Click on the card again. The easiest is via the Screens pane on the left.
  • Go to the UPDATE property and change it with the following expression to save the JobId field instead of the name field: DataCardValue17.Selected.JobId Warming: the name 'DataCardValue17' of the data card value (the drop down) is probably different in your app.
change Default property


5) Testing
Now press on the play button and edit the form to see the result. If you take a good look, you see the ID changing from 72 to 73 on the details screen.
Testing the form changes


Summary
In this post you learned how to change the standard textbox in a generated app to a very useful Drop Down. This is especially handy when you have a 1-n relationship with not too many records. In a next post we will try to find a solution for an n-n (many to many) relationship.

Now that you are ready with the edit form, you probably also want to change the JobId in the Details screen. You could for example solve this with a lookup on the text property of that label. Change Parent.Default to LookUp('[dbo].[Job]', JobId = Value(Parent.Default), Name).


Perhaps not part of the BI stack itself, but though a very useful supporting tool for BI projects. Thanks to coworker Siebe for helping figuring this out.