I want to execute a Synapse pipeline right after the deployment via Azure DevOps. How do you accomplish that?
 |
| Execute pipeline after deployment |
Solution
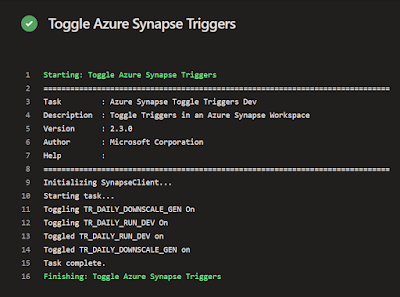
We can use a PowerShell task and then use that to execute a Create Pipeline Run Rest API. This will be an asynchronous execution (shoot and forget). If you also want to know the result of the pipeline then you have to create an additional WHILE or UNTIL loop and use the Get Pipeline Run Rest API. Note that you will then keep your DevOps agent busy while waiting.
1) Create Synapse pipeline
First create a pipeline in Synapse and name it for example pl_Master_Deployment. In this pipeline you can add all the activities for tasks that you want to do right after the deployment. For testing purposes you can add a simple wait activity.
2) Add PowerShell script
To execute the Synapse pipeline we will use a PowerShell script and a Rest API call to Pipeline - Create Pipeline Run. This Rest API will only start the pipeline but it doesn't wait for it to finish. So it's an asynchronously call. The PowerShell script is stored in the repository as a PowerShell file called SynapseExecutePipeline.ps1 and we will call it via the YAML file using an AzurePowerShell@5 task.
To execute the Synapse pipeline we will use a PowerShell script and a Rest API call to Pipeline - Create Pipeline Run. This Rest API will only start the pipeline but it doesn't wait for it to finish. So it's an asynchronously call. The PowerShell script is stored in the repository as a PowerShell file called SynapseExecutePipeline.ps1 and we will call it via the YAML file using an AzurePowerShell@5 task.
The script has only two parameters. First the Synapse WorkspaceName so you can use it to execute piplines in all environments of your DTAP. The second is the name of the pipeline.
If your pipeline name contains a space or an other 'forbidden' character then the EscapeDataString method will make sure it fits in a URL.
<#
    .SYNOPSIS
    This script executes a Synapse pipeline during the CICD process asynchronously. This means it doesn't wait for it to succeed (or fail).
    .PARAMETER WorkspaceName
    Name of the Synapse Workspace where you want to execute a pipeline.
    .PARAMETER PipelineName
    The name of the synapse pipeline that you want to execute.
    .EXAMPLE
    SynapseExecutePipeline.ps1 -SynapseExecutePipeline MySynapse `
                               -PipelineName MyPipeline
#>
Param(
   [Parameter(Mandatory=$true,
   HelpMessage="Name of your Synapse workspace.")]
   [ValidateNotNullOrEmpty()]
   [Alias("SynapseWorkspaceName")]
   [string]
   $WorkspaceName,

   [Parameter(Mandatory=$true,
   HelpMessage="Name of the pipeline that you want to execute")]
   [ValidateNotNullOrEmpty()]
   [Alias("SynapsePipelineName")]
   [string]
   $PipelineName
)

# Make sure that characters like spaces are encode for the URL
$EncodePipelineName = [System.Uri]::EscapeDataString("$($PipelineName)")

# Determine the URI of the REST API
$RestApiURL = "https://$($WorkspaceName).dev.azuresynapse.net/pipelines/$($EncodePipelineName)/createRun?api-version=2020-12-01"

Write-Host "Executing $($PipelineName) asynchronously in the Synapse workspace $($WorkspaceName)."
Write-Host "Rest API uri $($RestApiURL)"

# Create a dummy json because POST needs one. However not needed at the moment because there are no parameters
# Adjust script en json if you need paramters: https://learn.microsoft.com/en-us/rest/api/synapse/data-plane/pipeline/create-pipeline-run?view=rest-synapse-data-plane-2020-12-01&tabs=HTTP
$payload = @{dummy="dummy"} | ConvertTo-Json -Depth 3
$Result = Invoke-AzRestMethod -Method POST -Uri $RestApiURL -Payload $payload
if ($Result.StatusCode -lt 300)
{
   Write-Host "Asynchronous call of $($PipelineName) is done"
}
else
{
   Write-Error "##vso[task.logissue type=error]Something went very wrong. Pipeline not found or no access?"
   exit 1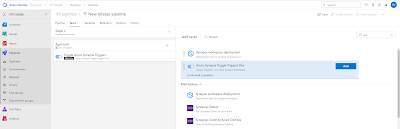
}In your deployment YAML we need to add an additional task. Put it somewhere after the Synapse workspace deployment@2 task or after the toggle-triggers-dev@2 task that will enable your triggers.
For the Azure Subscription parameter you can reuse the same Azure DevOps Service Connection as in your Synapse deployment task. If your Service Principal only got the role Synapse Artifact Publisher, then you need to give it an addtional role that also allows you to execute pipelines. For example Synapse Credential User or Synapse Administrator.
The WorkspaceName parameter can also reuse the value of the Synapse deployment task, but the PipelineName is hardcoded in this example. However you could ofcourse create a variable and/or parameter for this to make it easier to adjust.
            ###################################
            # Validate and Deploy Synapse
            ###################################
            - task: Synapse workspace deployment@2
              displayName: 'Validate and Deploy Synapse'
              inputs:
                operation: validateDeploy
                ArtifactsFolder: '$(Pipeline.Workspace)/SynapseArtifact'
                azureSubscription: ${{ parameters.ServiceConnection }}
                ResourceGroupName: ${{ parameters.Synapse_ResourceGroupName }}
                TargetWorkspaceName: ${{ parameters.Synapse_WorkspaceName }}
                DeleteArtifactsNotInTemplate: true
                DeployManagedPrivateEndpoints: true
                OverrideArmParameters: '
				  -LS_AKV_Secrets_properties_typeProperties_baseUrl				https://${{ parameters.KeyVault_Name }}.vault.azure.net/
				  -LS_ADLS_Datalake_properties_typeProperties_url				https://${{ parameters.Datalake_Name }}.dfs.core.windows.net/
				  -LS_ASQL_Metadata_connectionString							${{ parameters.Metadata_Connectionstring }}
                  '
###################################
# Execute Synapse pipeline
###################################
- task: AzurePowerShell@5
  displayName:  'Execute Synapse pipeline'
  inputs:
	azureSubscription: ${{ parameters.ServiceConnection }}
	scriptType: filePath
	scriptPath: $(Pipeline.Workspace)\s\CICD\PowerShell\SynapseExecutePipeline.ps1
	scriptArguments:
	  -WorkspaceName ${{ parameters.Synapse_WorkspaceName }} `
	  -PipelineName "pl_Master_Deployment"
	azurePowerShellVersion: latestVersion
	pwsh: true
ConclusionIn this short example we showed how to execute a Synapse pipeline right after deployment. You can use it for example to do some cleanup or setup in your datalake or lake database. Or use it to run your ETL for testing purposes.
And instead of running the pipeline immediately you could also create a (onetime) trigger and schedule it for the next evening which could be useful if you have multiple deployments during the day to the same environment.